
Point of Sale (POS) Management
Set up cashier stations, pair Android EDC terminals or mobile devices, download the official POS APK, monitor live cashier station telemetry, and manage store shifts from your merchant dashboard.
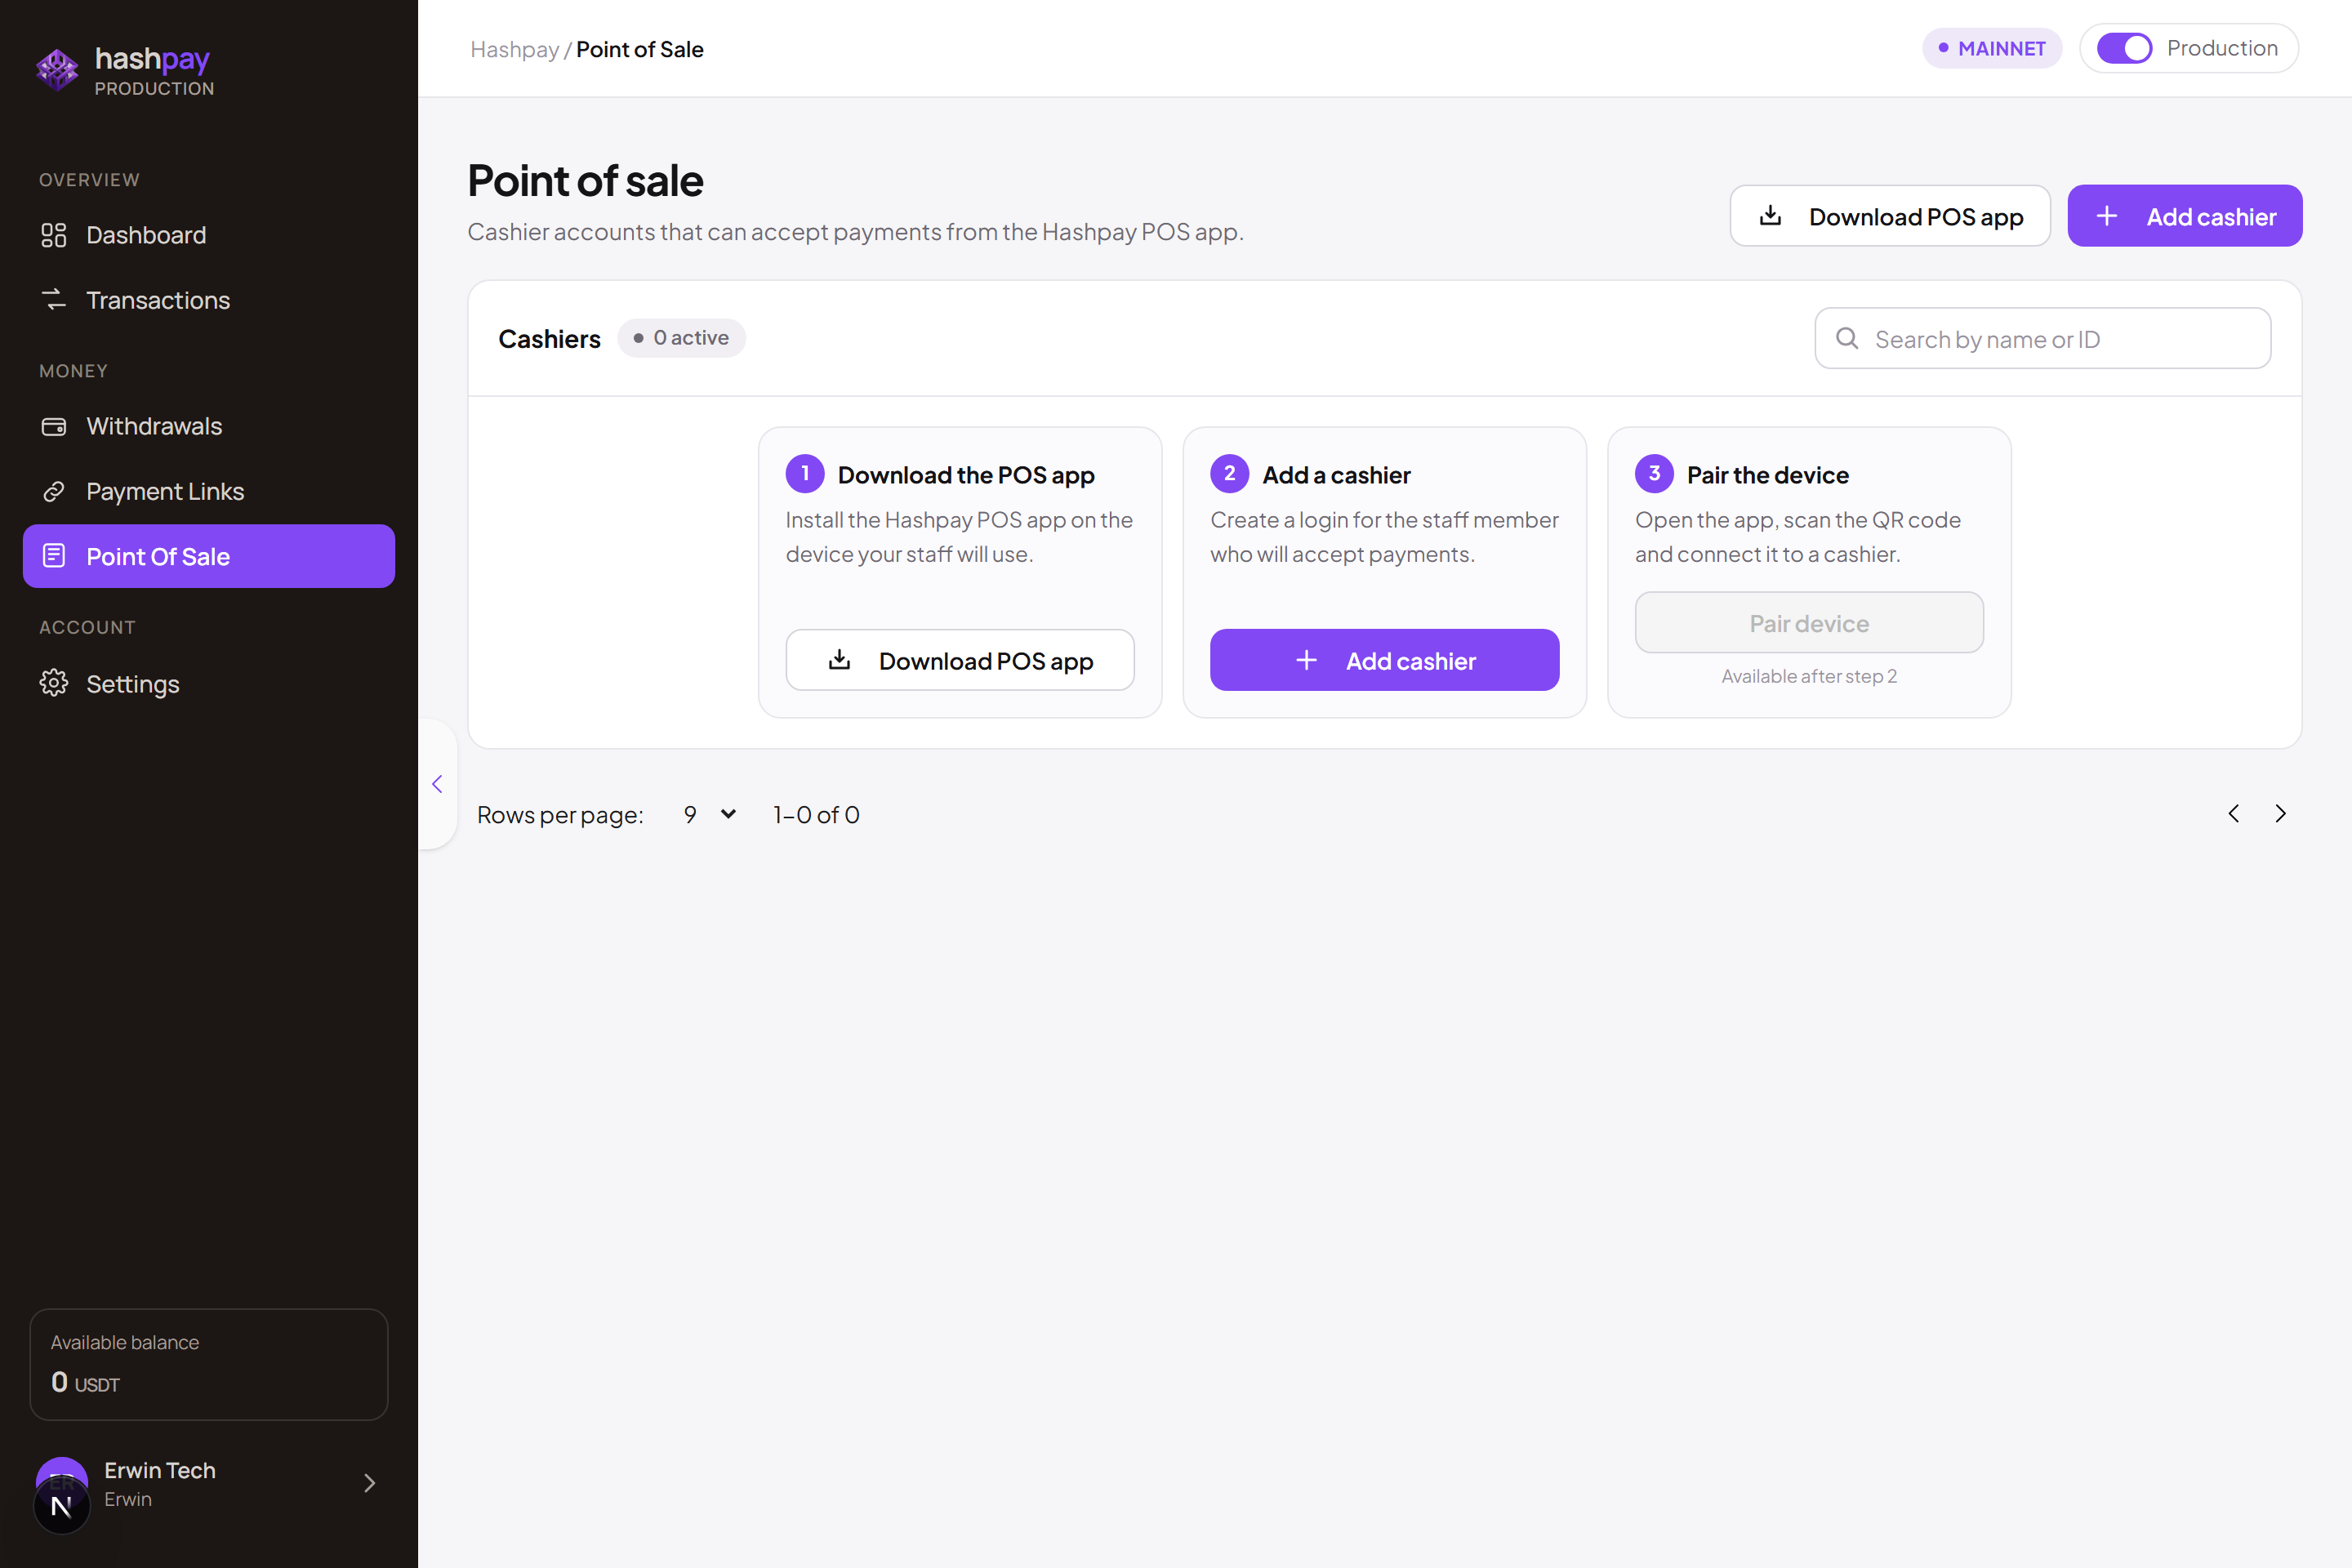
Download the official POS application
The official in-store cashier terminal application is HashpayPOS.apk (v1.1.2). It is built natively for Android (Kotlin & Jetpack Compose) and optimized for dedicated smart EDC hardware with built-in thermal printers as well as standard Android smartphones and tablets.
| Hardware Category | Supported Models | Recommended Use Case |
|---|---|---|
| Smart EDC Terminals | Sunmi (V2, V2 Pro, V2s, T2 Mini), iMin (Swift, D1), Pax (A920) | High-volume retail counters, cafes, restaurants with instant 58mm thermal receipt printing. |
| Android Smartphones | Any Android device running Android 8.0 or newer | Pop-up stores, food trucks, mobile delivery drivers, and service counters. |
| Android Tablets | Samsung Galaxy Tab, Lenovo Tab (10-inch or larger) | Front-desk counter displays, boutique showrooms, hotel concierge desks. |
- Access Download Link — From the Point of Sale page in your web dashboard, click the Download POS app button, or browse directly to
https://dashboard.hashpay.id/install-poson your Android device. - Sideload the APK — When prompted by Android security, allow downloads from your browser and enable 'Install from unknown sources'.
- Launch the App — Open Hashpay POS. On first launch, the app displays the terminal pairing screen ready to scan or enter code.
Create cashier stations & configure shifts
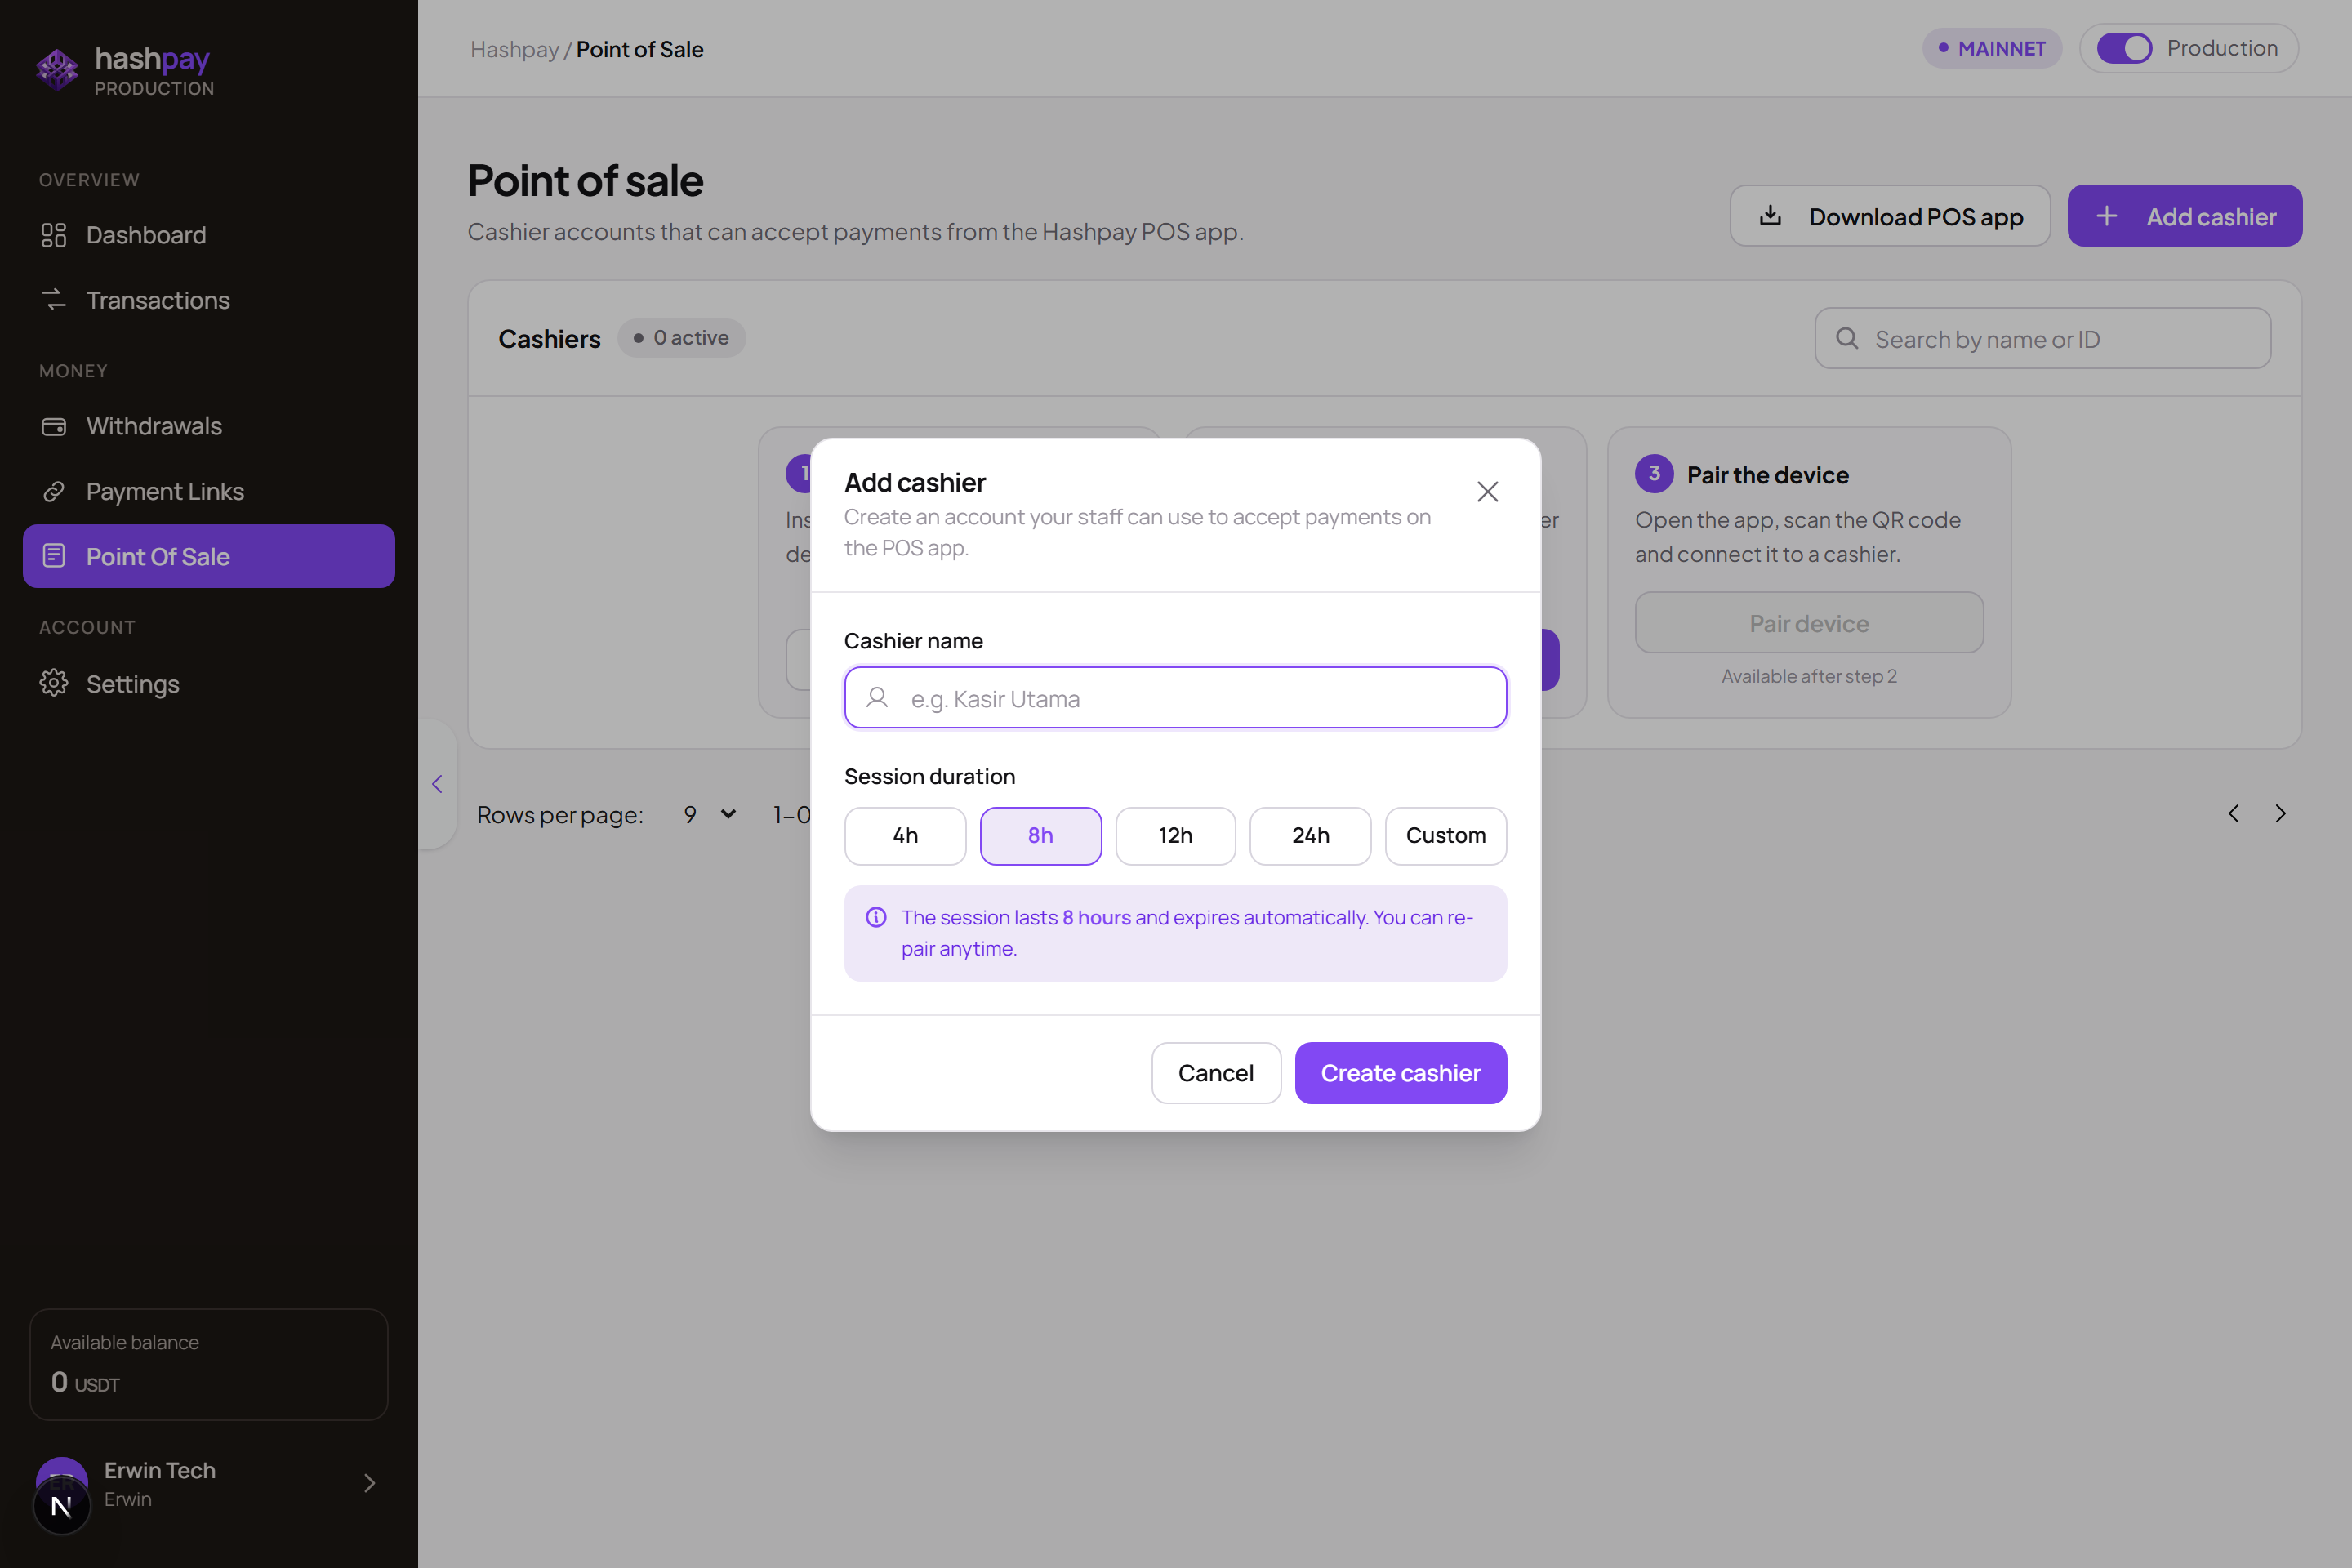
Every physical cash register or staff shift operates under an isolated cashier profile. This allows store owners to track revenues per counter and per employee shift:
- Click '+ Add cashier' — Open the creation modal at the top of the Point of Sale page (
/point-of-sale). - Enter Station Name — Assign an easily recognizable name (e.g., *'Kasir Utama 1'*, *'Bar Lantai 2'*, or *'Takeaway Booth'*).
- Select Shift Session Duration — Choose from preset shift lengths: 4 hours, 8 hours, 12 hours, 24 hours, or enter a Custom duration (in hours) matching your store's employee roster. When the duration elapses, the session automatically prompts the cashier to close and print the shift summary.
- Create Station — Click Create cashier. The terminal pairing modal will appear immediately displaying both a QR code and an 8-character manual pairing code.
Cashier station cards & live telemetry
The Point of Sale overview presents each cashier station as an informative telemetry card, giving managers real-time operational visibility:
| Card Element / Action | Description | Operational Purpose |
|---|---|---|
| Station Name | Custom label assigned during creation | Identifies the counter or physical register location. |
| Cashier ID (e.g. csh_live_9a8f...) | Unique system identifier with quick-copy icon | Used for IT auditing, multi-store tracking, and support inquiries. |
| Status Badge (Active / Inactive) | Live device connection indicator | Active (Green) indicates a physical terminal device is currently logged in and actively serving customers. Inactive (Gray) indicates no device is connected or the previous shift logged out. |
| Shift Expiration (expiredAt) | Exact timestamp when current shift closes | Shows managers when the staff roster ends and alerts if a shift is running overdue. |
| Pairing Button (QR icon) | Generates instant pairing credentials | Opens the pairing popup displaying a fresh QR code and 8-character manual code (120s TTL). |
| Edit Button (Pencil icon) | Edit station parameters | Update the station name or extend/adjust the shift session duration without deleting historical sales. |
| Delete Button (Trash icon) | Safely decommission station | Permanently removes the cashier station profile once all shifts are closed and audited. |
Pair a terminal (Two flexible methods)
You can securely connect any Android device to a cashier station using either of two methods:
- Method 1: Scan QR Code (Fastest — 5 Seconds) — On the Hashpay POS app, tap Scan QR and point the device camera at the pairing QR code displayed in your merchant dashboard. The terminal connects and authenticates instantly.
- Method 2: 8-Character Manual Code — If the device camera is unavailable, lighting is poor, or you are configuring a terminal remotely, tap Enter Pairing Code on the app and type the 8-character alphanumeric code (e.g.,
OYA8DZCT). The code is valid for 120 seconds to prevent pairing hijack attacks; click Refresh Code in the dashboard if it expires.
Cashier security & permission isolation
To protect store owners from employee theft or operational errors, POS terminals operate in strict cashier isolation. Here is what cashiers can and cannot do:
| Action / Capability | Cashier Terminal Permission | Merchant Owner Dashboard |
|---|---|---|
| Ring up sales & enter Rupiah bill | Allowed (Yes) | Allowed (Yes) |
| Display dynamic payment QR to customer | Allowed (Yes) | Allowed (Yes) |
| Print & reprint receipts | Allowed (Yes) | Allowed (Yes) |
| Close shift & view shift total | Allowed (Yes) | Allowed (Yes) |
| Withdraw merchant funds / Disburse to bank | Strictly Forbidden (No) | Allowed (Yes) |
| View or modify bank account details | Strictly Forbidden (No) | Allowed (Yes) |
| View API Secret Keys or Webhook secrets | Strictly Forbidden (No) | Allowed (Yes) |
| Change MDR fee or pricing settings | Strictly Forbidden (No) | Allowed (Yes) |